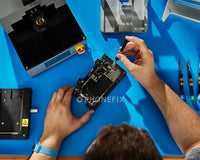
In this article, we will disassemble the iPhone 12 Pro step by step to understand the various parts and structure of the iPhone 12 Pro, and this is very helpful to us when we repair the iPhone 12 pro.
Step 1:
Unscrew the two screws at the bottom of the phone and take out the card slot.
Put the phone on the CPB Screen Separator heating platform and heat it for one minute, then remove the screen with the help of the suction cup and a plastic card.
We can see that the flex cable on the display is on the left, so we need to open the display from the right edge. When you lifting the screen, the ear speaker flex cable shorter, which reminds us to be careful when lifting the screen.
Step 2:
Remove the speaker flex and display flex. The speaker extension cord integrates speakers, floodlights, ambient light sensors and microphones.
Compared with the previous iPhone, the glass lens of the iPhone 12 Pro and the frame of the display assembly have been changed.
In detail, the display panel is placed under the glass lens instead of surrounding it.
And then disconnect the battery.
Step 3:
Remove the iPhone Front Facing Camera, and we can find that adhesive glued the dot projector flex and flash flex. When disassembling, the flex cable should be separated first to avoid damage.
Step 4:
Open the upper antenna flex cable. The cable integrates a wireless charging coil, power button, volume button and mute button. Remove the sticker glued flex cable and motherboard.
Step 5:
Remove the lightning connector flex cable with Tweezers. In addition, we can find that the SIM card holder of the iPhone12 Pro is independent and connected to the motherboard through a bent wire. Compared with the iPhone 12, the iPhone 12 Pro has a LiDAR Scanner.
Step 6:
Next, remove the motherboard. The middle layer of the motherboard uses medium-temperature solder instead of the original low-temperature solder, and adopts double-layer surfacing, which increases the difficulty of motherboard maintenance.
Step 7:
Remove the speaker and taptic engine. Pull out the iPhone battery adhesive sticker and take out the battery. The microphone and sensor are under the stand. Remove the plastic sheet attached to the rear edge of the battery.
Pry up the microphone with Pry Piece and remove the lightning rod cord.
Step 8:
Remove the antenna and pry up the volume bend cable.
Step 9:
Heat the wire charging coil with a heat gun. Remove a copper coil and a magnet coil around the wireless charging coil, and then remove the wireless charging coil.
Step 10:
Separate and remove the flash flex cable. It is also glued with adhesive.
Finally, remove the upper antenna.
The disassembly of iPhone 12 Pro has been completed.
Notes:
1. When removing the screen from the plastic card, be careful not to break the flex cable.
2. Face ID components are particularly fragile, please be careful not to touch the iPhone dot projector module when disassembling, otherwise static electricity will damage the module and cause the module to malfunction.
3. When disassembling, we need to keep the angle less than 90 degrees between the display and the rear casing to avoid breaking the wire.
4. It is recommended to use a heat gun at 150°C to heat the charging coil.


